Are you looking to control your IoT devices remotely using SSH on a Mac without spending a dime? You've come to the right place! In today's interconnected world, IoT devices are becoming increasingly popular, and understanding how to use SSH for remote access is a critical skill for both hobbyists and professionals. This guide will walk you through the process step-by-step, ensuring you can securely connect to your IoT devices from your Mac.
SSH (Secure Shell) is a protocol that allows you to securely access and manage remote devices over a network. Whether you're a beginner or an experienced user, this article will provide you with all the necessary information to set up SSH remote access for IoT devices on your Mac for free.
By the end of this guide, you'll have a clear understanding of the tools, configurations, and best practices required to use SSH effectively. Let's dive in and explore how you can leverage SSH for remote IoT management.
Read also:Carnival Dress To Impress A Comprehensive Guide To Captivating Styles
Table of Contents
- Introduction to SSH
- Why Use SSH for IoT?
- Prerequisites
- Setting Up an SSH Server
- Connecting to Your IoT Device
- Securing Your SSH Connection
- Troubleshooting Common Issues
- Advanced Features
- Cost-Effective Options
- Conclusion
Introduction to SSH
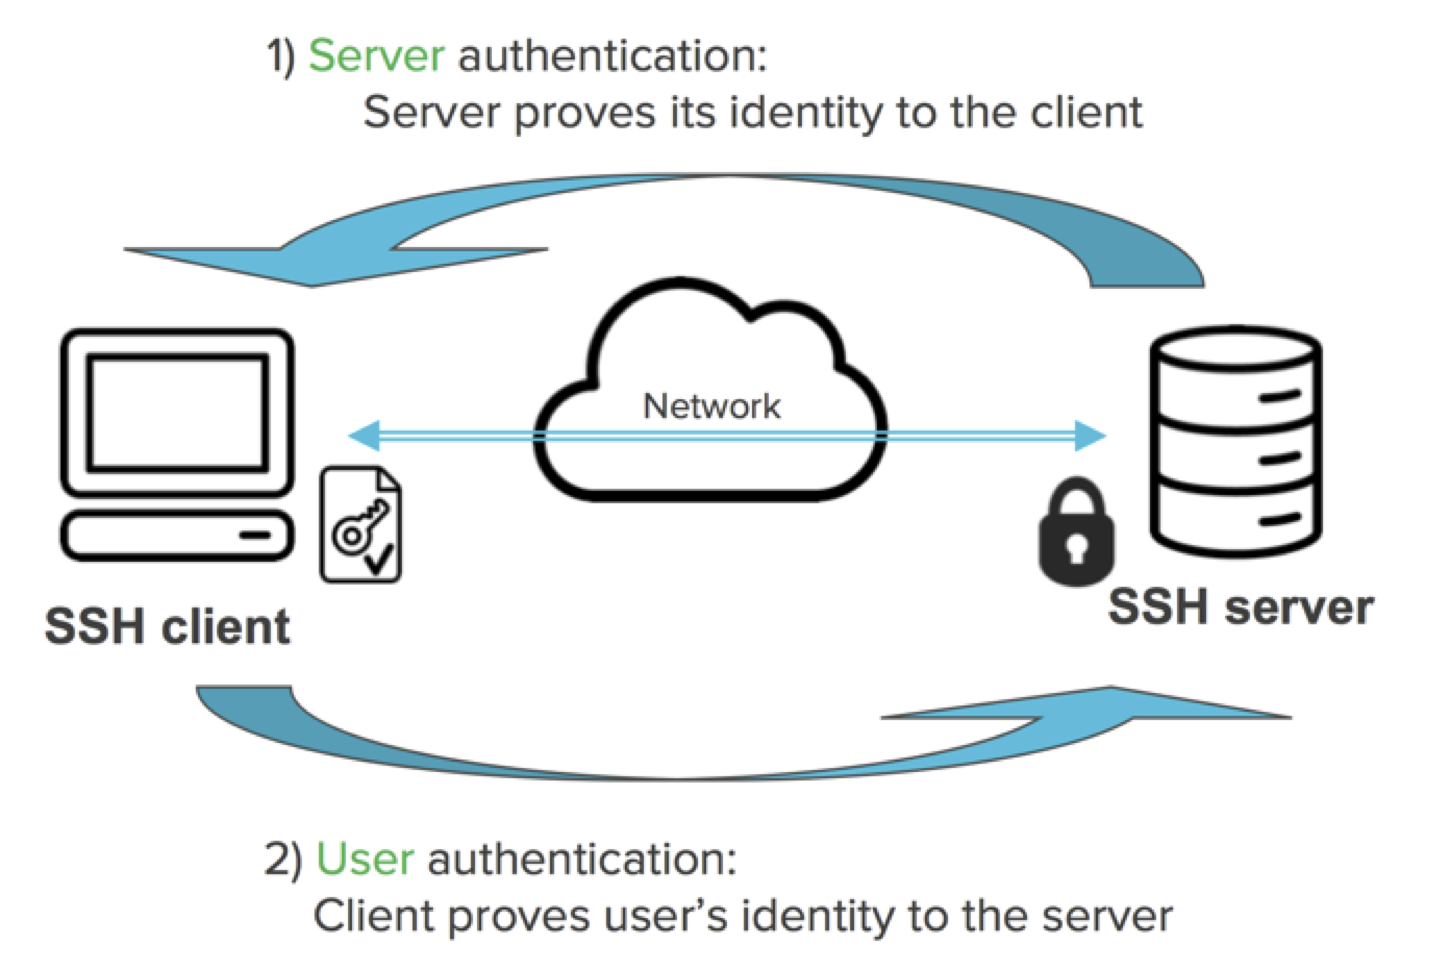
SSH, or Secure Shell, is a cryptographic network protocol designed for secure data communication. It provides a secure channel over an unsecured network, allowing users to manage and control remote devices safely. SSH is widely used in IT environments, including IoT ecosystems, due to its robust security features.
Key Features of SSH:
- Encryption for data in transit
- Authentication mechanisms to verify user identity
- Support for various commands and file transfers
Understanding SSH is crucial if you want to manage IoT devices remotely, especially when you're using a Mac. This section will lay the foundation for the rest of the guide.
Why Use SSH for IoT?
IoT devices are often deployed in remote locations, making physical access impractical. SSH offers a reliable solution for remotely managing these devices. By using SSH, you can:
- Securely connect to your IoT devices from anywhere
- Run commands and scripts to automate tasks
- Transfer files between your Mac and IoT devices
Beyond convenience, SSH ensures that your data remains protected during transmission, reducing the risk of unauthorized access. This makes it an ideal choice for IoT applications where security is paramount.
Advantages of SSH Over Other Protocols
Compared to other remote access protocols, SSH offers several advantages:
Read also:New 2025 Full Spanish Anime Movies A Complete Guide
- Strong encryption for secure communication
- Support for public key authentication for added security
- Compatibility with a wide range of devices and operating systems
Prerequisites
Before you begin setting up SSH for your IoT devices, ensure you have the following:
- A Mac computer with macOS installed
- An IoT device with SSH server capability
- A stable internet connection
- Basic knowledge of terminal commands
TIP: If you're new to terminal commands, don't worry! We'll guide you through each step to ensure you can follow along easily.
Setting Up an SSH Server
To use SSH, you need to set up an SSH server on your IoT device. Most modern IoT devices come with SSH server capabilities, but you may need to enable it manually.
Steps to Enable SSH on Your IoT Device
1. Access the IoT Device: Connect to your IoT device using its default interface (e.g., web UI or CLI).
2. Locate the SSH Settings: Navigate to the settings menu and look for an option related to SSH.
3. Enable SSH: Turn on the SSH server and note down the IP address of your device.
Once the SSH server is enabled, your IoT device will be ready to accept remote connections.
Connecting to Your IoT Device
With the SSH server up and running, it's time to connect to your IoT device from your Mac. Follow these steps:
Step-by-Step Guide
1. Open Terminal: Launch the Terminal application on your Mac.
2. Enter the SSH Command: Type the following command, replacing "username" and "IP_address" with your IoT device's details:
ssh username@IP_address
3. Authenticate: Enter your password or use public key authentication if configured.
You should now have a secure connection to your IoT device, allowing you to execute commands and manage it remotely.
Securing Your SSH Connection
Security is a top priority when using SSH for IoT devices. Follow these best practices to enhance the security of your SSH connections:
- Use strong passwords or implement public key authentication
- Disable root login to prevent unauthorized access
- Change the default SSH port to a non-standard port
By implementing these measures, you can significantly reduce the risk of unauthorized access to your IoT devices.
Public Key Authentication
Public key authentication is a secure method of authenticating SSH connections without using passwords. Here's how to set it up:
1. Generate Key Pair: Use the following command to generate a key pair:
ssh-keygen
2. Copy Public Key: Copy the public key to your IoT device using:
ssh-copy-id username@IP_address
3. Test Connection: Try connecting to your IoT device without entering a password.
Troubleshooting Common Issues
Even with careful setup, issues can arise when using SSH. Here are some common problems and their solutions:
- Connection Refused: Ensure the SSH server is running and the IP address is correct.
- Authentication Failed: Double-check your username, password, or public key configuration.
- Timeout Errors: Verify your network connection and firewall settings.
If you encounter any issues, refer to the troubleshooting section for guidance.
Advanced Features
Once you're comfortable with basic SSH operations, you can explore advanced features to enhance your workflow:
- SSH Tunnels: Create secure tunnels for transferring data between devices.
- SSH Config File: Simplify connection management by using an SSH config file.
- Automated Scripts: Use SSH to automate repetitive tasks on your IoT devices.
These features can save you time and effort, making your IoT management more efficient.
Cost-Effective Options
Using SSH for IoT remote access is a cost-effective solution, especially when compared to proprietary software or hardware solutions. With SSH, you can:
- Avoid subscription fees by leveraging open-source tools
- Minimize hardware costs by using existing devices
- Scale your IoT ecosystem without incurring additional expenses
By choosing SSH, you can achieve professional-grade remote access without breaking the bank.
Conclusion
In this comprehensive guide, we've covered everything you need to know about using SSH for remote IoT access on a Mac for free. From setting up the SSH server to securing your connections and exploring advanced features, you now have the tools and knowledge to manage your IoT devices effectively.
We encourage you to try out the steps outlined in this article and share your experience in the comments below. If you found this guide helpful, don't forget to share it with your friends and colleagues. For more insightful content on IoT and related technologies, explore our other articles on the site.
Happy IoT managing!